*This post may contain affiliate links for which I earn commissions.*
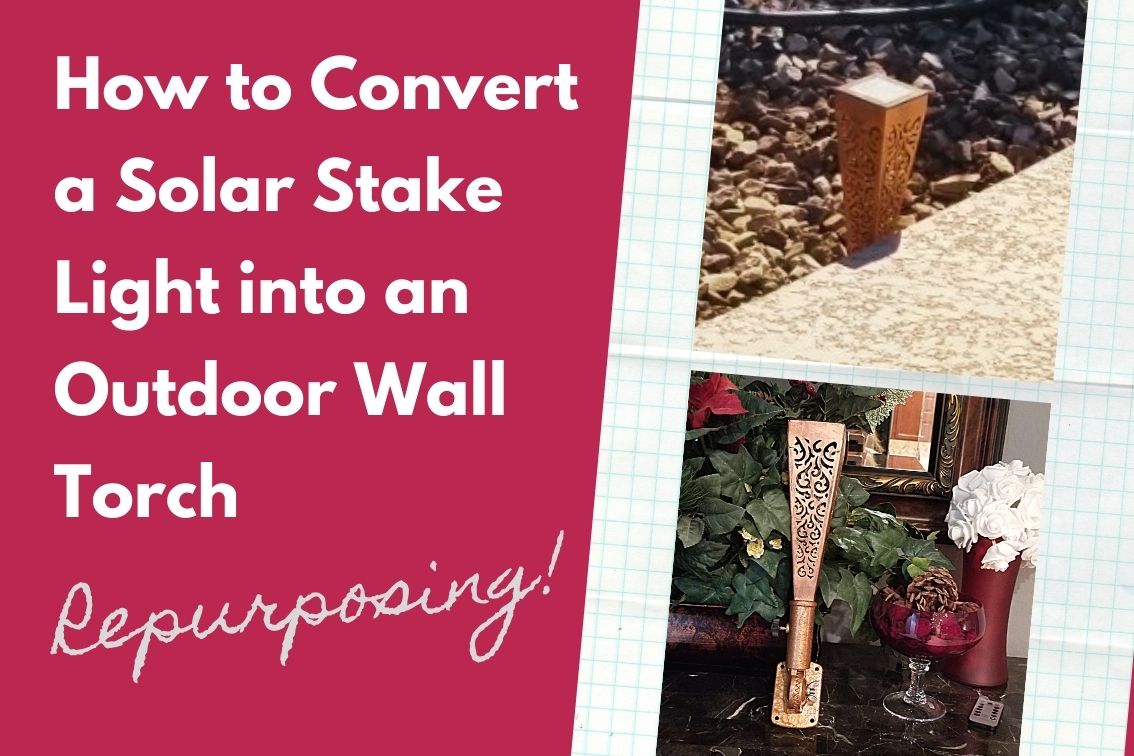
If you have one of those patterned solar stake lights here’s how you can turn it into a pretty torch you can mount to an outside wall.
I had a set that I really liked but they weren’t the right height for where I wanted to put them.
They look nice in this picture but when you get to the other side of the yard you can hardly tell they’re there.
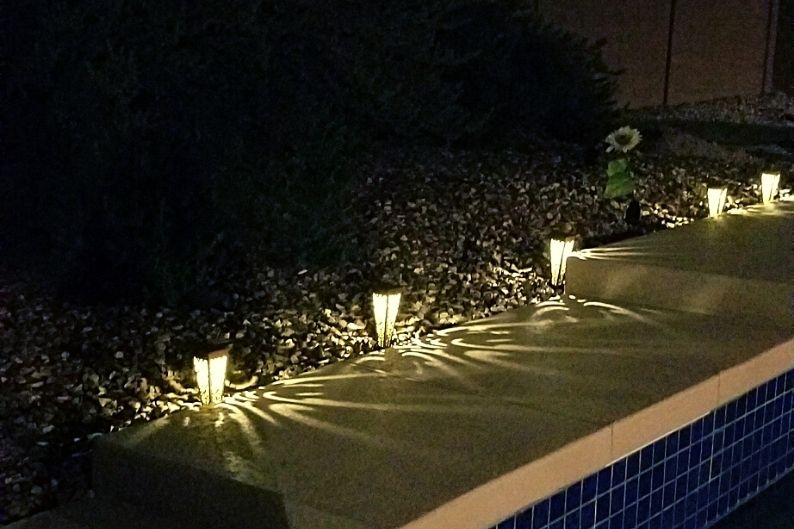
I started playing around with them and trying them out in different spots and heights in my yard looking for a better spot for them.
Turns out that I liked them best about four feet off the ground held up close to the concrete block wall that surrounds our property.
In that position, we could see them so much better from our patio table and they spread really interesting shadows on the wall that were also visible from inside our house looking out.
Since the solar panel was on top of the light stake it meant that as long as I kept it upright it would still get plenty of sun.
Every part of our wall gets a good amount of sun each day, too, so I knew I’d have lots of placement options if I could just figure out how to get them at the height I wanted.
At first, I looked for wall-mounted solar lights but I could only find styles that had a flat back and cast the light pattern forward and I wanted the light to point towards the wall.
You can also get solar torches but I could only find ones that were meant to be stuck in the ground.
The obvious solution seemed to be to repurpose the ones I had – especially since I liked them.
Hubby and I toyed around with a number of different ways we could convert them into something more like a torch including using painted PVC pipe as a sort of tall stand for each but, instead, we found a better-looking option.
Repurposing a Flag Pole Holder
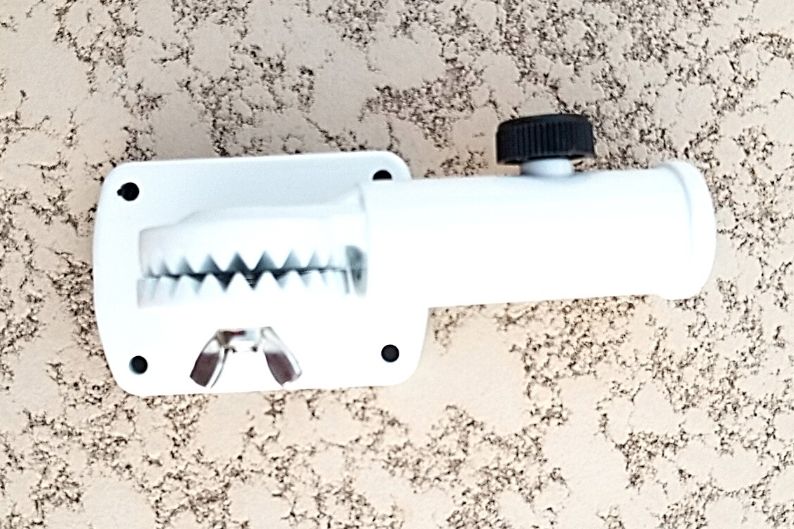
We decided to make use of a flag pole holder as the base of our solar torch idea.
These are designed to be attached to a wall and usually come with the screws to do so.
They have a cylinder with a round opening and we figured we could put the stake of the light in that opening.
The one we chose had a base that was 3.3 x 2.4 inches and had a 1-inch diameter opening where the flag pole would normally go. The cylinder length was 3.3 inches.
We ran into a couple of challenges:
Below you’ll find the instructions for the project and how we dealt with each of these issues.
Cutting the Stake
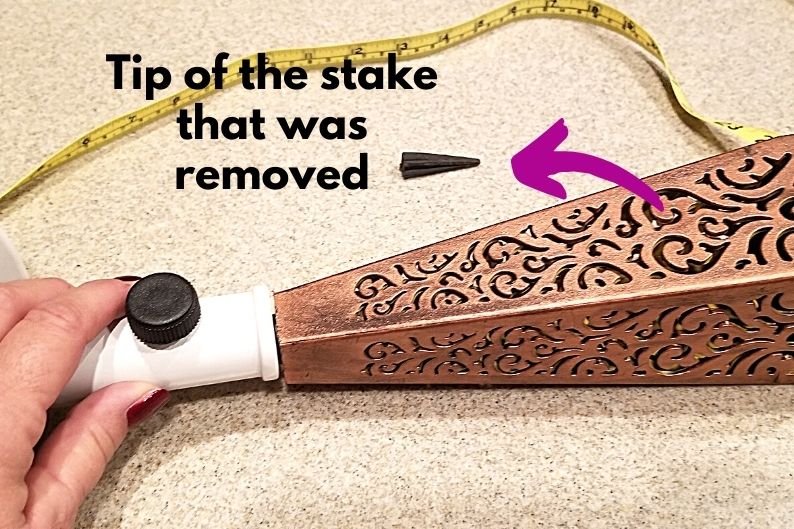
While the stake could be removed from the solar light, the base of the light itself was too wide for the opening in the flag pole holder so we had to keep it attached but it was too long.
The length forced the base of the light to stick out too far from the holder.
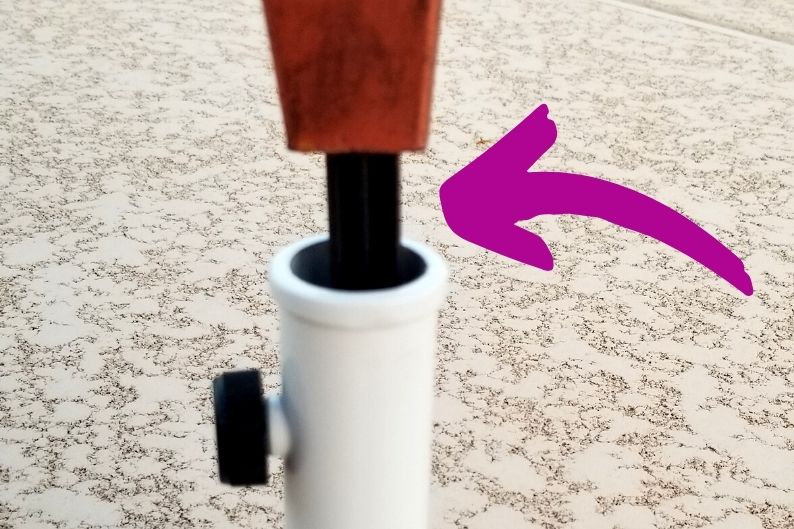
I needed to cut off about 1 1/2 inches of the stake tip so the light base would sit flush.
To do this, I put the stake into the holder and measured the excess.
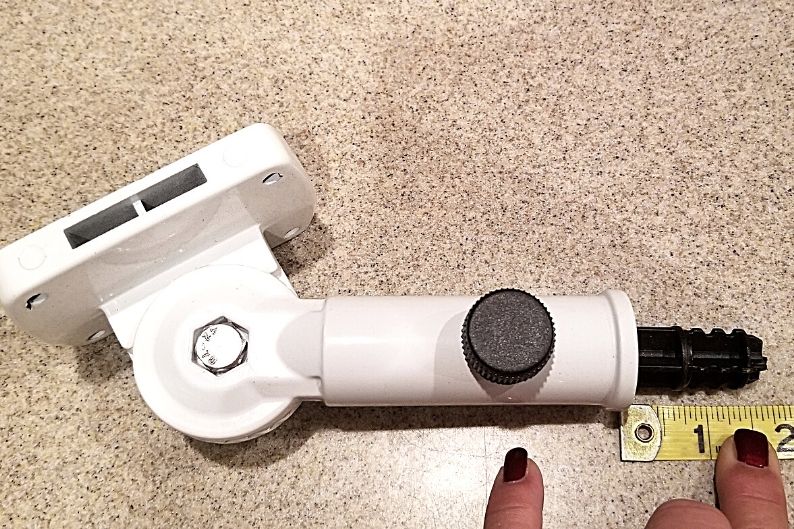
I then scored the stake at the point where I needed to make the cut.
I used a small Sawzall to cut halfway through the stake by hand and the rest snapped right off. This step took just a couple of minutes.
The light now sat flush in the holder.
Painting the Flag Pole Holder
I could only find three colors of holders – black, white, and silver. All of those looked out of place next to the color of our wall (a Mustang brown) and the copper lights.
I found a can of Rust-Oleum copper hammered spray paint that can be used outdoors. It looked like it would match closely enough to make the light and holder look as if they belonged together.
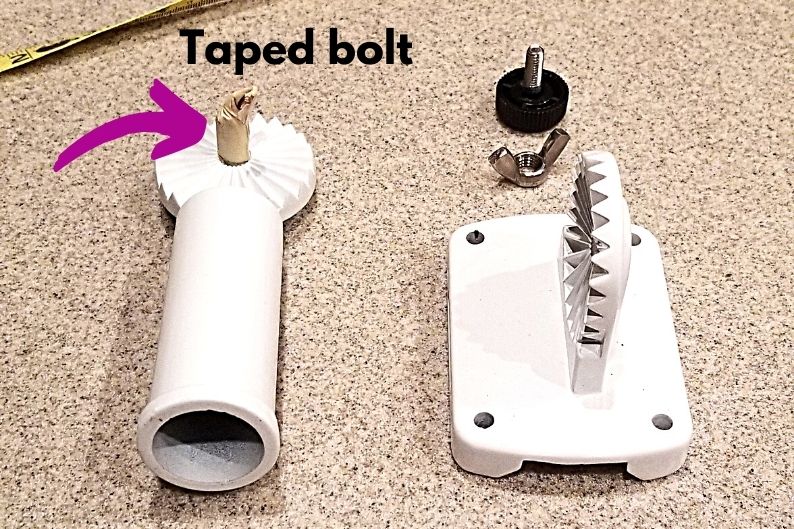
I removed the black-handled tightening screw and the wing nut that tightens the jaws of the holder. I know from experience it’s so easy to lose those little pieces so I put them in a baggie along with the screws that came for mounting the base plate.
Because the finish of the holder was so glossy I used some 220 grit sandpaper to rough up the exterior of both pieces so the paint would adhere better.
I then washed the pieces and let them dry.
I taped over the bolt that holds the jaw pieces together as this was easier than removing it.
I put the pieces on a tarp I’d laid out on the ground in the yard and painted the top and sides of both pieces.
Rust-Oleum’s instructions say to wait an hour and apply a second coat but I found this went on pretty thick (or I got a little carried away) so I skipped that step.
I waited a couple of hours, turned over the piece with the cylinder opening and painted the other side. I didn’t need to do that to the base plate since the backside would face the wall and no one would see it.
I think you could get through 4-6 torch holders with one 12 ounce can.
(I absolutely love the hammered copper look of this paint!)
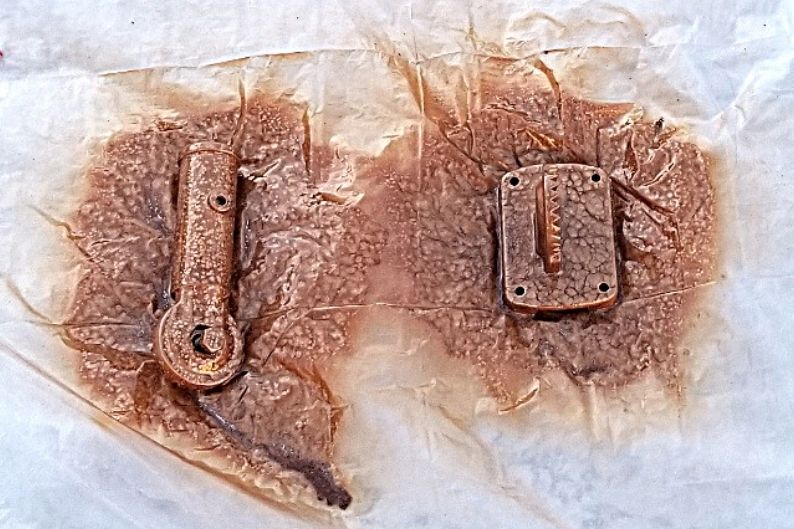
I let the pieces dry for 24 hours and then reassembled them.
The end result was just what I’d hoped for – the look of a torch with both the holder and the light looking as if they were made to go together.
If the paint spray color hadn’t looked good with the lights I would have painted the lights the same color.
The caps are removable which would have protected the solar panel and bulb so I wouldn’t have had to tape anything off but I didn’t feel I needed to do this which saved both time and money.
(If you think you’re going to have to paint your light covers to match then plan ahead and get enough cans of spray paint.)
Securing the Light in the Holder
The next challenge was to make the stake wide enough so that it would fit tightly into the holder and sit straight.
I chose to wrap the stake in layers of tin foil because that’s what came to mind and I happened to have plenty.
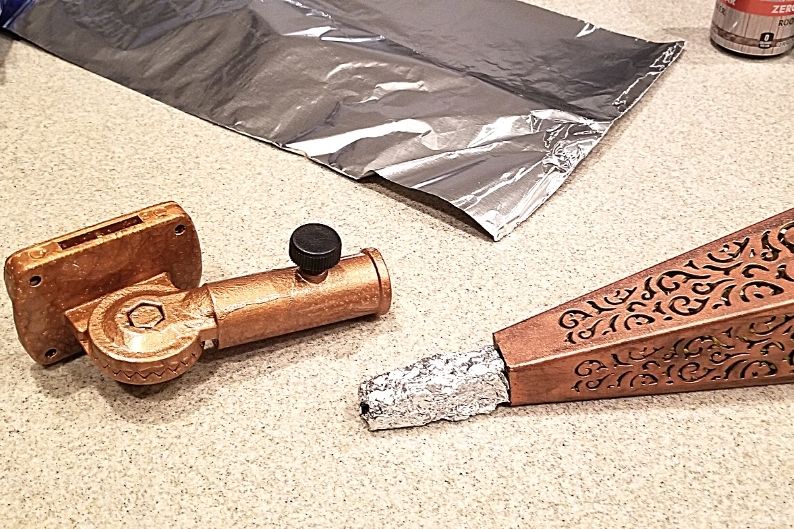
I didn’t think about it until after the fact, but you could use a bit of PVC pipe in the flag holder and put the stake into the PVC pipe.
You’d have to get the right diameter that would fit both your stake and the opening of the holder and maybe glue them together but, if done correctly, the base of your light could then be tightened into place with the screw in the holder.
Truly, though, the tin foil solution was so fast and easy. It made the stake thick enough that I had to wedge and twist it into the hole of the holder. I didn’t even need to use the tightening screw to keep it in place.
An added benefit is that I can easily swap out the style of solar light without having to deal with more screws or glue (another option we considered).
Either way, I now had a straight, snug fit.
Attaching the Solar Torch to the Wall
The flag pole holder came with four screws and holes already drilled into the base plate.
We chose a location, held the plate on the wall, marked the spots for the four screws and then hubby screwed them into place.
The final step was to angle the light. If it was straight up in the holder then it was too close to the wall to show the pattern.
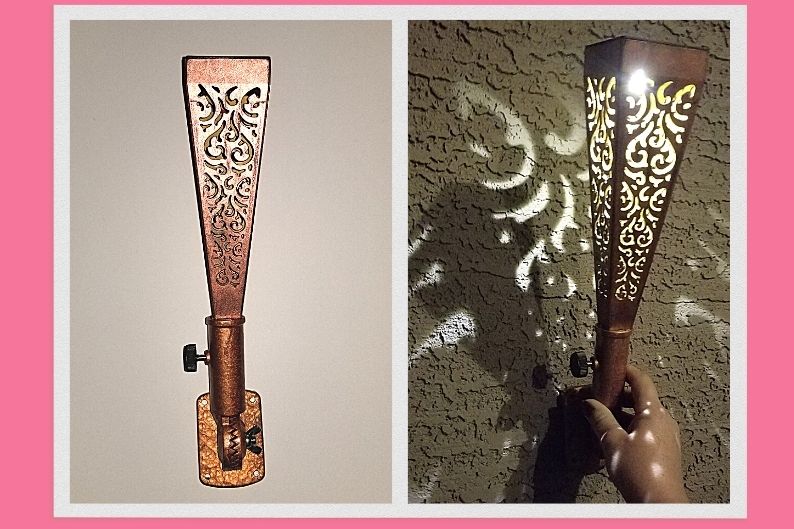
The holders we chose allow you to adjust the tilt so the torches can sit away from the wall and this made a big difference.
You only have to unscrew the round plates, slide the teeth into the angle you want, and then screw them back together.
Now we have no cords to run, a great wall torch that spreads light against the wall, and I can easily swap out the style of light anytime.
Of course, now I’m already thinking that I might want to replace the lights with those ones that have flickering flames.
Plus, I want to put one at each edge of my patio.
So many options!
If you give this project a try I’d love to see your results!
